A strip of cardstock
Pigment ink pads (Colorbox parchment, seafoam green, black, velvet and gold)
A paper towel
A small sponge
A can of spray fixative (found in art stores)
A piece of paper for masking
Seashell stamp by Fred B. Mullett

Directions
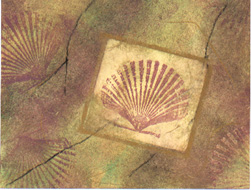
First, using the parchment colored pad, cover the entire surface of the cardstock with a fairly thick layer of ink. Next, dab the velvet, black and seafoam green ink in two diagonal lines over the first layer. Don't overdo it, you can always add more color later. Then, using the sponge, lightly blend the colors together. When you're finished, the colors should be relatively distinct but blended at the edges.
Now you're ready to add your stamped image. Stamp a copy of the seashell onto the paper you've reserved for masking. Draw a square or rectangular border around the image and cut along the border lines. Carefully position the outer frame over your cardstock. Using the paper towel, remove as much of the ink as you desire. The ink can be completely removed if you dampen the paper towel and will remove less ink if it is dry. Ink the seashell with velvet ink and stamp an impression in the center of the frame that you just created.
Using the edge of your mask paper as a guide, stamp a gold frame around the seashell
You will now need the strip of cardstock in order to replicate the striations in marble. Dab the edge of the cardstock into the black inkpad and then onto your blended artwork. Try to replicate the veins found in marble.
Using the velvet pad, overstamp the seashell image on the corners of the card
Once you're satisfied with your project, spray it with a light coating of spray fixative to keep it from smearing.
HINT: If you make a mistake, don't fret, just wipe the offending area off using a damp paper towel and reapply your colors.
If you want more information on this technique Click Here

 Main
Page
