

Embossing is a simple process that changes your flat stamped image into one that is three dimensional. It can also add a satiny sheen, glitter, or iridescence to the image.
You'll need a few supplies to emboss an image and they are all inexpensive. You will need a stamp, embossing ink, embossing powder, a heat source as, of course, something to stamp on. We'll discuss these items one at a time.
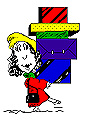
The size of your stamp is immaterial-large stamps work as well as small stamps. It doesn't matter if the stamp is made out of hard rubber, soft rubber or a potato. The most important factor when deciding to emboss is the complexity of the image. Any stamp used for embossing should be fairly simple. Outline stamps work very well but any stamp that depicts a large amount of detail (such as shadows) will not render effectively because the embossing powder expands when heated and lines which are close together tend to run into each other.
Embossing ink can be clear or a variety of colors. It can be purchased in a stamp pad, marking pen or in a sponge applicator bottle. The best results are achieved by using embossing ink as it stays wetter longer than any other type of ink but pigment ink will also work. If you are going to emboss the image on a stamp, use a stamp pad. The markers are used for drawing fine lines or writing messages and the applicator bottles are best used to re-ink a stamp.
Embossing powder also comes in clear and a variety of colors as well as glitter, satin, iridescent and variable (which changes color when applied over different colored inks). It is purchased in small jars.
The best heat source for embossing is a heat gun. They are inexpensive and can be purchased in craft and rubber stamp stores. They regulate the heat perfectly for embossing and they emit a narrow strem of heat so they are less likely to scorch paper. If you do not want to purchase a heat gun, you can use any hot flat surface like the top of a toaster oven, a hot plate or an iron but be careful as these can burn paper if not watched carefully. You cannot use a hair dryer-it's not hot enough.
Paper is the most popular surface for embossing. A medium to heavy weight card stock is best. Lightweight paper (such as xerox paper) tends to warp. The paper can be glossy, plain or vellum (heavy tracing paper).
Embossing is amazingly easy to do. Ink your stamp using the embossing ink or pigment ink of your choice. Stamp your impression and then immediately sprinkle the entire image with embossing powder. Using ink and powder in the same color tends to intensify the color. When you use a colored powder over clear ink, the color of the final image is the color of the powder. If you emboss one color ink with a different color powder your final image color will be a combination of both (the results are subtle so don't be afrad that you will get muddy colors). Tap off the excess powder (it can be reused, so just put it back into the bottle) and remove any stray powder with a small, soft paint brush. Then apply the heat source. A heating gun should moved slowly over the top of the paper. Watch the image, as soon as the powder puffs up, it's done. Be careful not to over-emboss or the image will flatten out and blur around the edges. If you are using an alternative heat source, you will have to place it under the paper. If you are feeling really adventurous, you can emboss in two colors. To do this, apply the first powder color to a selected area and emboss it. Then apply the second color and emboss it. This can be tricky because the first color tends to over emboss but if you're careful and move quickly, you'll be impressed with the results
You can emboss striaght lines using either embossing tape or low tack scotch tape. Utilizing embossing tape (a double sided adhesive with a protective strip) is the easiest method. It comes in varying widths and can be purchased in stamp stores. Lay the tape down, press to ensure an even bond, remove the protective backing and emboss. Using low tack (removable) tape is a little trickier but this tape is cheaper and more readily available. Cut two pieces of tape a little longer than your project. Position the strips on the project-they should be parallel to each other and have a space between them (this is where you will put the embossing powder). Press down to ensure an even bond. Coat the open space with a thin layer of embossing ink. Sprinkle with embossing powder. Carefully remove both pieces of tape. Emboss as usual. .
To see a project using this technique Click Here
 Back to Techniques
 Back to Main Page